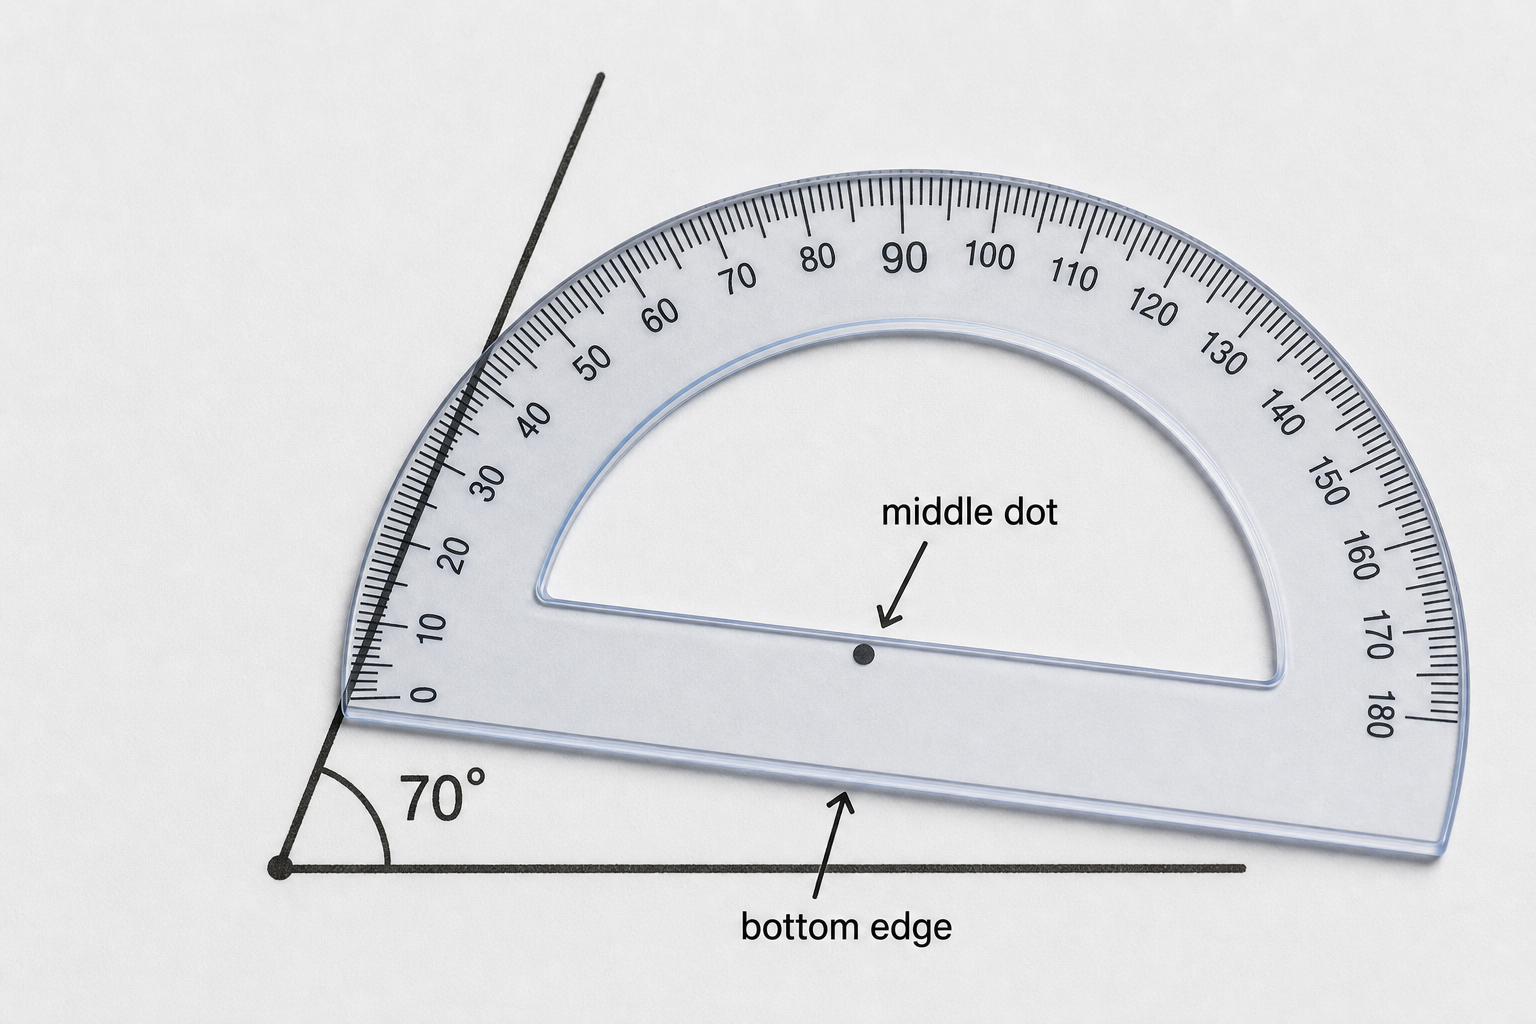
Here is an angle with a protractor laid on top of it. Just by looking, does this look right to you, or does something seem off?
Two things to check with your eyes. The middle dot of the protractor should sit right where the two arms meet, at the corner. The straight bottom edge of the protractor should lie flat along one of the arms. Is each of those in the right place here?
Display the spot-the-mistake image as pupils settle. Take three hands-up answers, not open call-outs. Listen for pupils noticing the middle dot is off the corner or the bottom edge is not along an arm.
Don't reveal the correct placement yet — that lands in Watch and Notice, where we'll give these the proper names vertex and baseline. Keep this to about a minute.
Watch the placement: the centre dot (the vertex, where the arms meet) sits right on the corner, and the bottom edge (the baseline) lies along one arm starting at zero. Now look at the two number rings. The baseline arm sits on 0 on the ring that counts up towards the second arm, so we follow that same ring up to the second arm and read 40°. The other ring would say 140° — that is the wrong ring, because it does not start at zero on our baseline arm.
Same careful placement. We start at the zero on our baseline arm and follow that ring up. The second arm reaches past the right angle, so we read 130°.
The two arms make a perfect square corner. Both rings meet at the same number here, so the scale reads exactly 90° either way.
This angle bends past halfway round. The protractor only reaches 180°, so look at the two angles together. The small angle is 70°, and the big reflex angle is the rest of the way round. Together they go the whole way round the vertex — and a full turn round a point is 360°. So the reflex angle is whatever is left after the 70°: 360° − 70° = 290°.
Walk each example aloud, one at a time. The single most important habit to model: centre on the vertex first, then baseline along an arm. Say it verbatim each time.
The inner scale is on for this lesson because reading the right ring is the whole point.
We measure on the board together now. One pupil comes up, places the protractor carefully, and reads the angle aloud. Everyone else: keep your own protractor out at your desk, estimate the size silently in your head first, then get ready to agree or to say what you would change.
For this round the angle stays between 0° and 180°, so each one is acute, right or obtuse. Estimate the size first — your estimate tells you which ring to trust.
This round is for talking it through together — pupils take turns at the board and the class agrees or corrects out loud.
Set three or four different angles in turn, all within 0–180°. Before each read, ask the class to estimate (bigger or smaller than a right angle?) so they catch a wrong-ring reading before it happens. Rotate four pupils to position the protractor and read aloud.
Watch for the centre drifting off the vertex — the commonest slip. Revoice a good fix: centre on the vertex, then swing the baseline onto the arm.
Take out your 'Measure the Angles' practice sheet. With your own protractor, measure each of the three angles on the sheet and write its size in degrees beside it. Then mark each one as acute, right or obtuse.
Hand out the printable practice sheet (or use the three angles drawn on the board if you have no printout). Walk the room glancing at protractor placement — centre on the vertex, baseline along an arm. No individual marking; this is whole-class copybook practice, not assessment.
Today we work through these angles together: 35°, then 95°, then 145°, and finally a reflex angle of 290°. Each one gets a step harder. We place the protractor, read the size, and check before moving on.
This round is the practice bank — pupils take turns at the board, check each answer, and the class confirms before moving on. Keep the board work brisk rather than over-explaining.
The 35° catches careless readers who grab 145° off the wrong ring — make them estimate first. The 290° reflex needs the whole-turn step: the small angle is 70°, and 360 − 70 = 290 because the two go all the way round; talk it through as a class. Use the Check ✓ as part of the narration: yes — that's it.
How does estimating the size of an angle first stop us from reading the wrong scale on the protractor?
Listen for pupils linking the estimate to a scale check: if I think it's about 40 and the scale says 140, I'm on the wrong ring. Revoice that as the rule of the lesson: estimate first, then the number can only be the one that makes sense. Head off any pupil who reads numbers without estimating at all.
Next we turn the skill around: instead of reading an angle, you will construct your own exact angles with the protractor.
Quick recap of the centre-then-baseline habit. Hold up one protractor and re-state the placement order one last time before the activity-book practice.
You're previewing this lesson. Get full access to this lesson and hundreds more — each one ready to teach, with interactive activities, printable resources and pupil progress tracking built in.