Put your hand flat on the middle of your chest and keep very still. Can you feel a gentle thump, thump, thump? That is one of your organs, hard at work, and you cannot even see it!
Our bodies are full of busy parts hidden under our skin. Today we are going to find out the names of the main organs inside us and where each one lives.
Keep this light, just a curiosity hook. Ask "What did you feel? What do you think is doing that?" and take a few guesses. Don't name organs yet, that comes next. No props needed beyond their own hands.
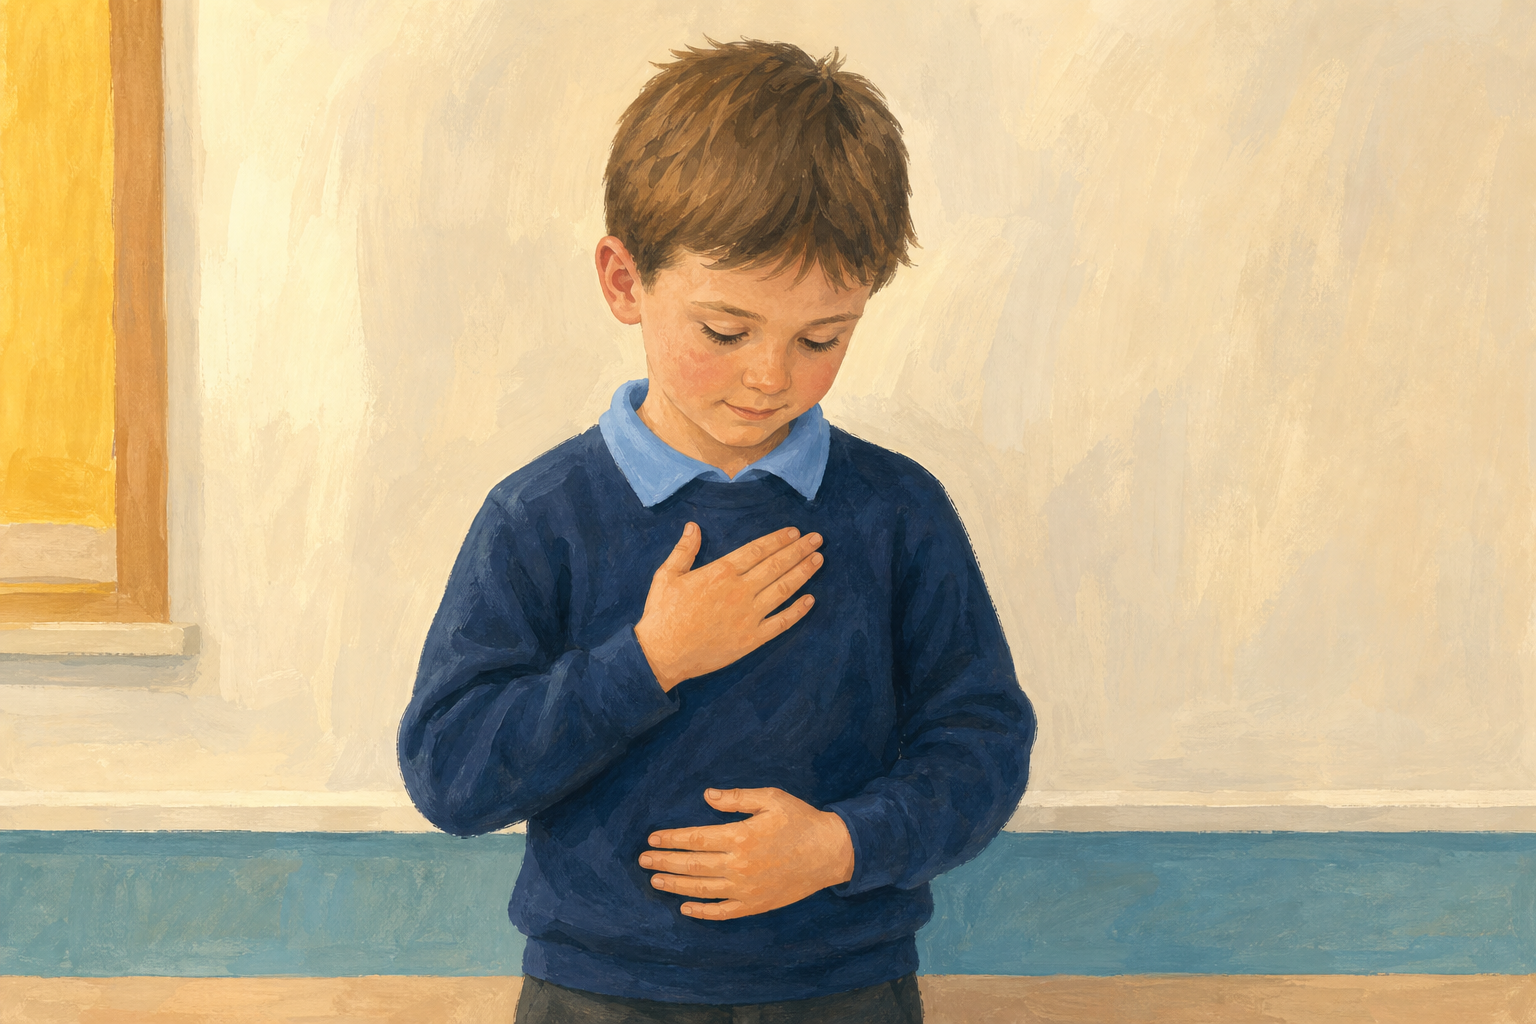
An organ is a part inside your body that does one big, important job. You have lots of organs, but today we are meeting five of the main ones. We will meet them one at a time, and each time your teacher reads about an organ you can point to where it sits on your own body.
The table below is our reference. Your teacher will walk through it with you, one organ at a time, so don't try to read it all at once. Look at the one organ being talked about, then find it on your body.
| Concept | Why it matters | Example |
|---|---|---|
| Brain — the organ inside your head that thinks, remembers and tells the rest of your body what to do | Without your brain you could not learn, move or feel anything | Your brain tells your hand to catch a ball before you even think about it |
| Heart — a muscle in the middle of your chest that pumps blood all around your body | Blood carries food and the oxygen from the air you breathe to every part of you, so your heart never stops | You can feel your heart thumping faster after you run around the yard |
| Lungs — two organs in your chest, one on each side, that fill with air when you breathe in | Your lungs take in the air your whole body needs to stay alive | Take a big breath and feel your chest get bigger as your lungs fill up |
| Stomach — a stretchy bag in your tummy that starts breaking down the food you eat | Your food has to be broken into tiny bits before your body can use it | After lunch your stomach is busy churning up your sandwich |
| Intestines — long, coiled tubes below your stomach that take the goodness out of your food | This is how the energy from your food gets into the rest of your body | Your intestines are coiled up like a long, soft tube to fit in your tummy |
Walk the class through this table one organ at a time, do not let pupils read all five rows in a block. Treat the on-screen table as your reference, not a reading exercise for the class. For each organ: read just that one row aloud yourself, point to it, then have every pupil point to roughly where it sits on their own body before you move to the next. A simple way to control the pace is to cover the lower rows with a sheet of paper on the IWB, or to point along the table with a finger or pointer so the class follows only the organ you are on.
Where each one sits: head for brain, middle-left of chest for heart, both sides of chest for lungs, upper tummy for stomach, lower tummy for intestines. This keeps pupils doing a little action between each organ rather than reading five rows at once.
Common misconception: many children think the heart is on the far left edge of the chest, it is actually near the middle, tilted slightly left. Many also draw the stomach far too low, point out it sits high up, just under the ribs.
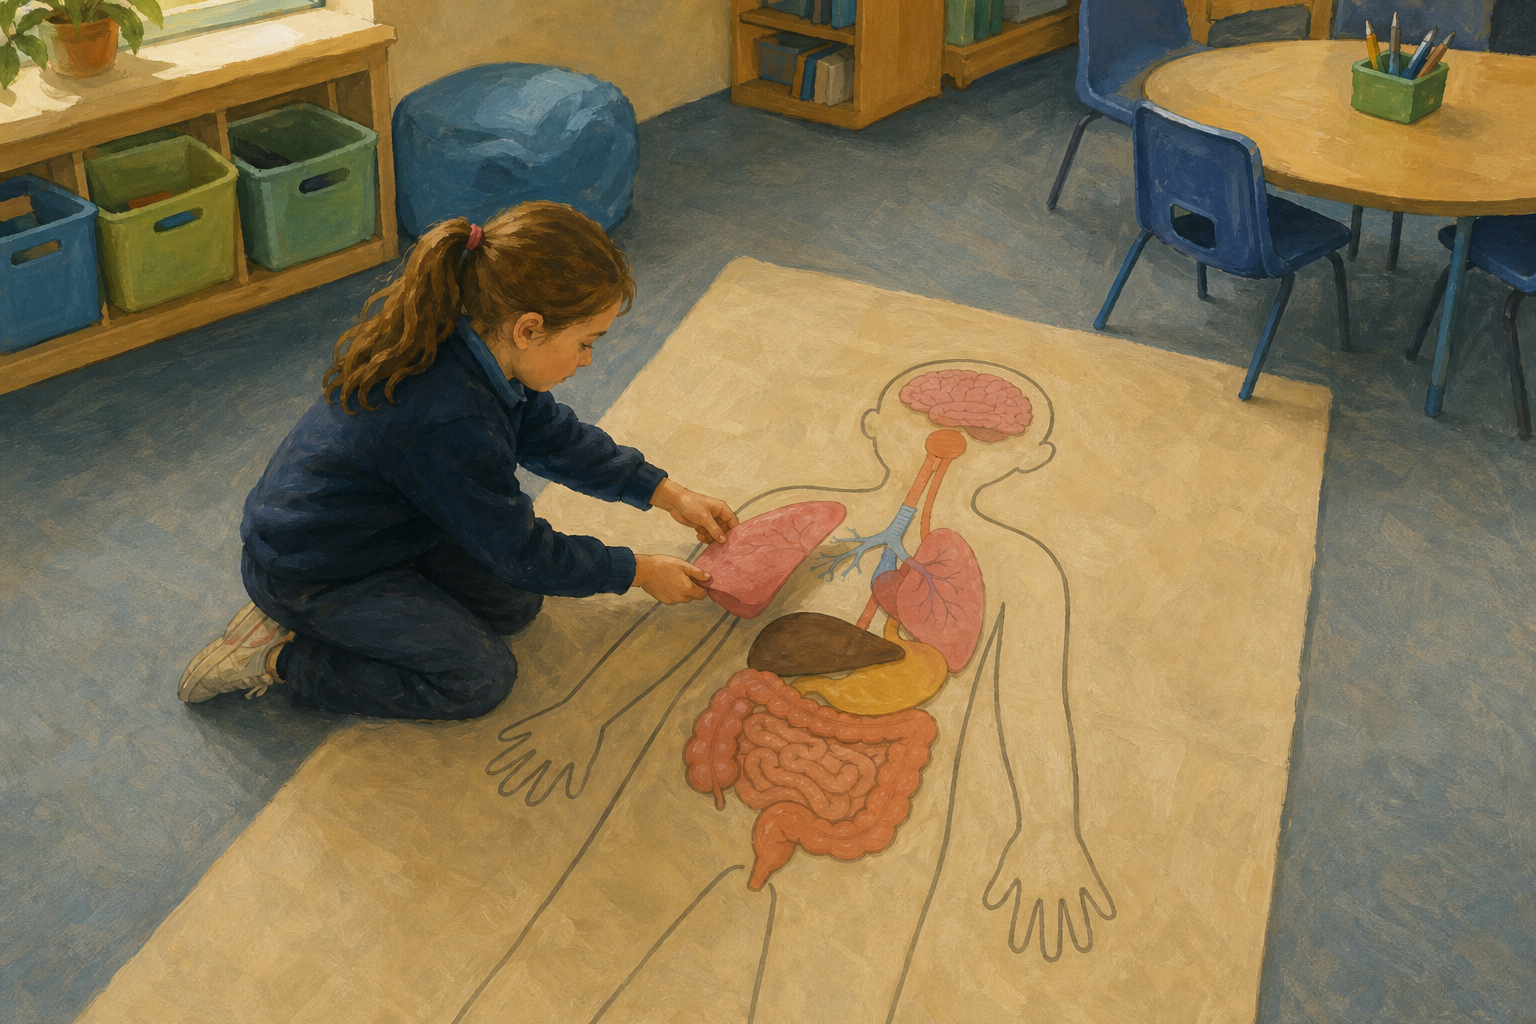
Watch as we draw round a classmate on a big sheet of lining paper to make a life-size body outline. Now we have a body shape with nothing inside it yet.
This activity is all about where each organ lives. We are going to take turns. When it is your turn, choose an organ cut-out and decide where it belongs: where does the brain go? Where does the heart sit? Place it on the outline and tell us why you put it there. If you are watching, your job is to decide whether you agree, so be ready to say "yes, that's right" or "I would move it".
Focus of this step: location. Keep the talk on where each organ sits, not what it does (the naming and function comes back in the next step). Set-up: ask a willing volunteer to lie on a length of lining paper on the floor and draw round them with a marker, in front of the class, so everyone sees the outline being made (this is the only set-up, no labelling or organ-drawing needed). If you are short on time you may draw the outline before the lesson to protect the placement minutes. Lay the organ cut-outs face up beside the outline.
Take each organ in turn. One pupil places it; the rest of the class are the judges. Ask "Who can place the lungs? Why there?" then turn to the watchers "Are they right? Where would you have put it?" Let pupils self-correct by feeling on their own bodies first.
The modelled cycle: think aloud as you place the first one yourself, "I think the brain goes in the head, because that is where I do my thinking. I'll place it here. Yes, that looks right." Then hand the rest to the children.
Support: before a less confident pupil takes a turn, let them turn to a partner and agree together where the organ should go (a paired prediction), then place it. Challenge: ask pupils to say which organs sit beside each other.
We know where the organs sit. Now let's make sure we can name each one. On the screen you can see a body with the brain, lungs, heart, stomach and intestines all in their places. Five name labels are waiting at the side.
We will do this together: as a class we will work out which label matches which organ, then one of us will come up to drag it onto the right organ. If you are at your seat, your job is to call out which organ you think the label names, and remind us what that organ does. Think carefully, the heart is in the middle, the lungs are on both sides, and the stomach sits higher than the intestines.
Focus of this step: naming and function (the floor activity covered location). Drive this on the IWB, this is a together-at-the-front activity. The diagram shows the internal organs of a child's body including the head; the five draggable labels are brain, lungs, heart, stomach, intestines. Call on pupils to name where each label goes, and as each label is placed ask "and what does that one do?" so the activity adds the function recall on top of placement.
Use this to reinforce the two misconceptions from earlier: the heart's central position and the stomach sitting high. Ask the class "Are they right?" before confirming each one.
Long ago, nobody had ever seen inside a living person. Early doctors had to learn carefully where the organs sit and what they do. Then, just over a hundred years ago, X-ray machines were invented, and later scanners, that let doctors take pictures of the inside of a living body without any cutting at all.
Here is something a doctor might see on an X-ray. Have a good look at it, then let's talk together. This is a question with no single right answer, so any idea you have is welcome, just put your hand up and share what you think. Why is it so useful for a doctor to be able to see inside you without an operation?
This is the Nature of STEM thread: people had to work out the body's insides over a very long time, and clever inventions changed everything. After two active steps this one is talk-based, so anchor it to the X-ray image on screen so pupils have something concrete to look at and react to. Make it clear all guesses are welcome, you want hands up, not silence. Keep the discussion to two or three minutes.
Prompts: "What can you see in this X-ray?" (the bones of an arm), "What might a doctor look for in it?" (a broken bone), "How would it feel to have a scan instead of an operation?" Draw out that inventions like the X-ray let us learn and help people without harm. Display-only, nothing is written here.
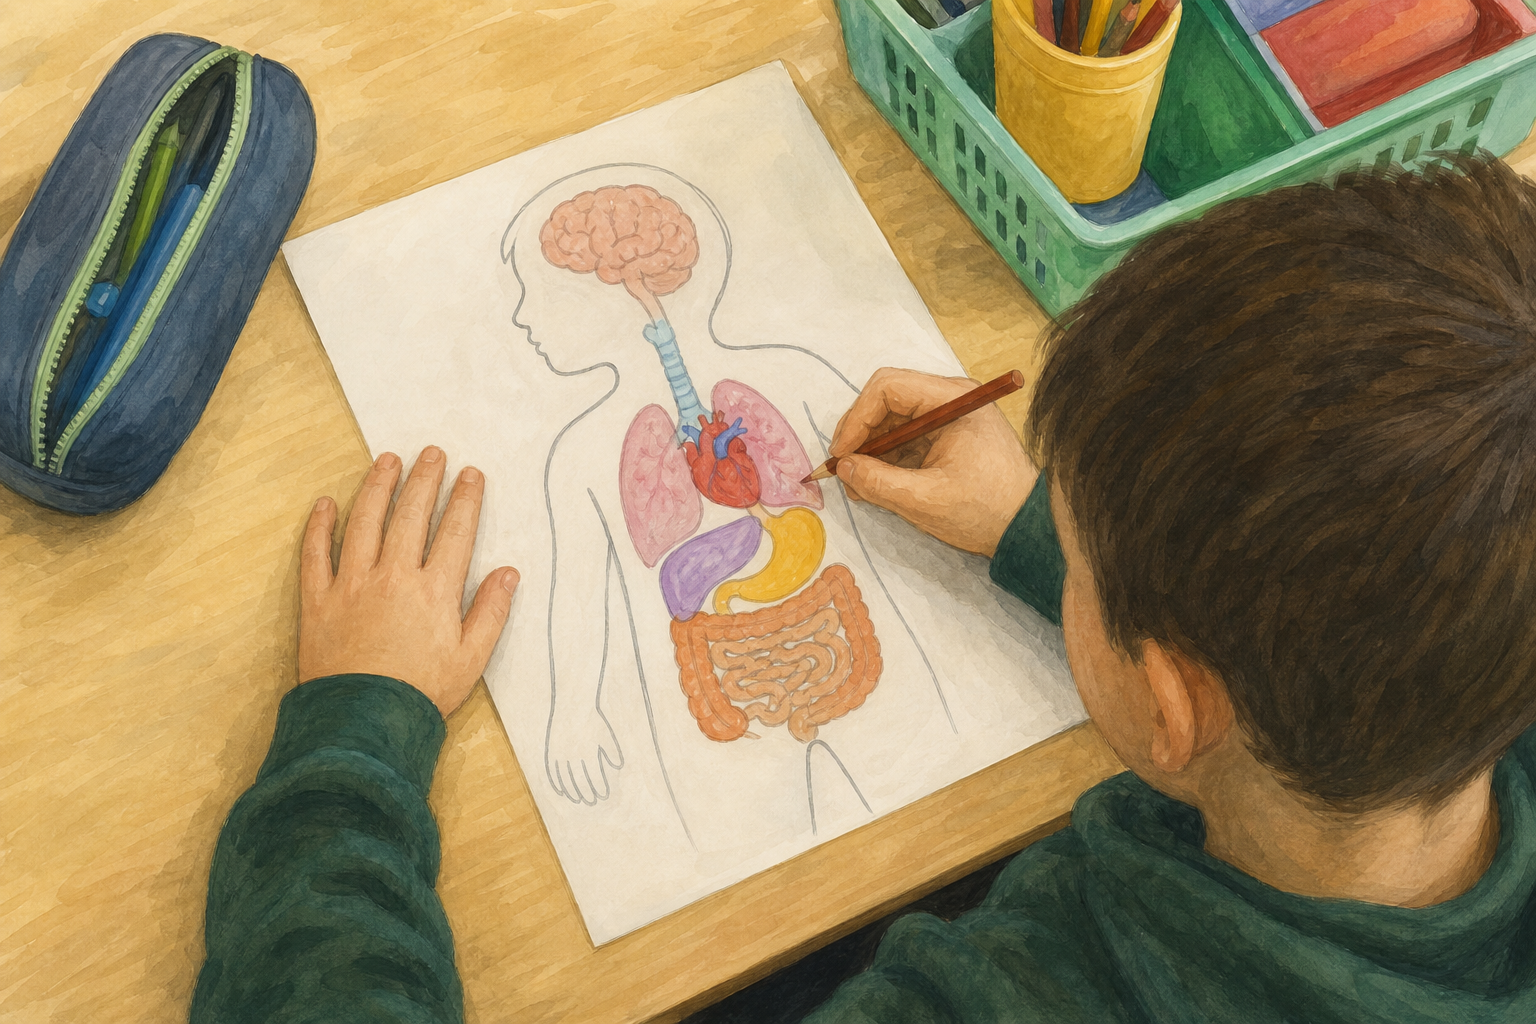
Now it is your turn to make your own record, all by yourself. On your Investigation Journal page there is a body shape, just like our big one on the floor. Draw each of the five organs in the right place and write its name beside it: brain, heart, lungs, stomach and intestines.
Look back at the diagram on the screen if you need a reminder of where each one sits.
Focus of this step: independent consolidation. The floor activity was about location and the IWB activity about naming; here each pupil pulls both together on their own. Hand out the Investigation Journal drawing page. Pupils work individually, drawing and naming the five organs in place. Circulate and check the heart sits near the middle and the stomach sits above the intestines, the two misconceptions from earlier. This is the recording you will check; allow about 12 minutes for it.
Support: for pupils who find the blank shape hard, offer a body outline with the organ positions lightly marked for them to colour and name. Challenge: ask early finishers to add a note saying which organs sit beside each other (the heart between the lungs, the stomach above the intestines).
Today we learned that our bodies hold a set of main organs, and each one has its own job and its own place. The brain thinks, the heart pumps, the lungs breathe, and the stomach and intestines deal with our food.
Talk with the person beside you: which organ would you most like to find out more about, and why?
Quick think-pair-share to close, spoken only. Revoice a few answers and remind the class that we will look at one organ much more closely soon.
Homework idea: ask an adult at home to point to where their heart is, then check if they got it right (middle of the chest, not the far left).
You're previewing this lesson. Get full access to this lesson and hundreds more — each one ready to teach, with interactive activities, printable resources and pupil progress tracking built in.